 HappyShield
免责声明(Disclaimer)
The University of Cambridge (UC) and the University of Queensland (UQ) make no warranty of any kind, express or implied, about the design, characteristics, durability, proper use or performance of the HappyShield, including but not limited to implied warranties of merchantability and fitness for any particular purpose. The HappyShield is designed to minimise exposure to fluids and sprays, but UC and UQ do not warrant that HappyShield will protect users from COVID-19 infection or any other infectious disease. Nothing in this material constitutes medical advice, and users should seek their own medical advice about whether HappyShield is suitable for the use they intend, and whether they should use it in conjunction with any other medical or other strategies. To the fullest extent allowed by law, UC and UQ exclude all implied warranties, guarantees, terms and conditions. UC and UQ are not liable for any claims, demands, damages or injuries, including but not limited to property damage, bodily injury or illness, death, indirect, special or consequential damages (“the Claims”) arising out of using the HappyShield, and users of HappyShield release UC and UQ and their officers, employees, contractors and agents from all Claims.
工具
- 激光切割机
- 10吨压机
- 能够切割1毫米钢丝绳的钳子
- 剪刀 或 刻刀
- 钻头 或 螺丝刀
材料
三件式冲压夹具
- 4毫米 中密度纤维板(MDF)
- 1毫米 钢丝绳
- 6-20毫米 木螺钉
- 透明胶带
护罩
- 0.5 毫米厚的PET聚酯塑片 或者至少是 醋酸纤维塑片 (Acetate sheet)
- 20 毫米宽的针织松紧带(70%聚酯,30%橡胶)
制作步骤
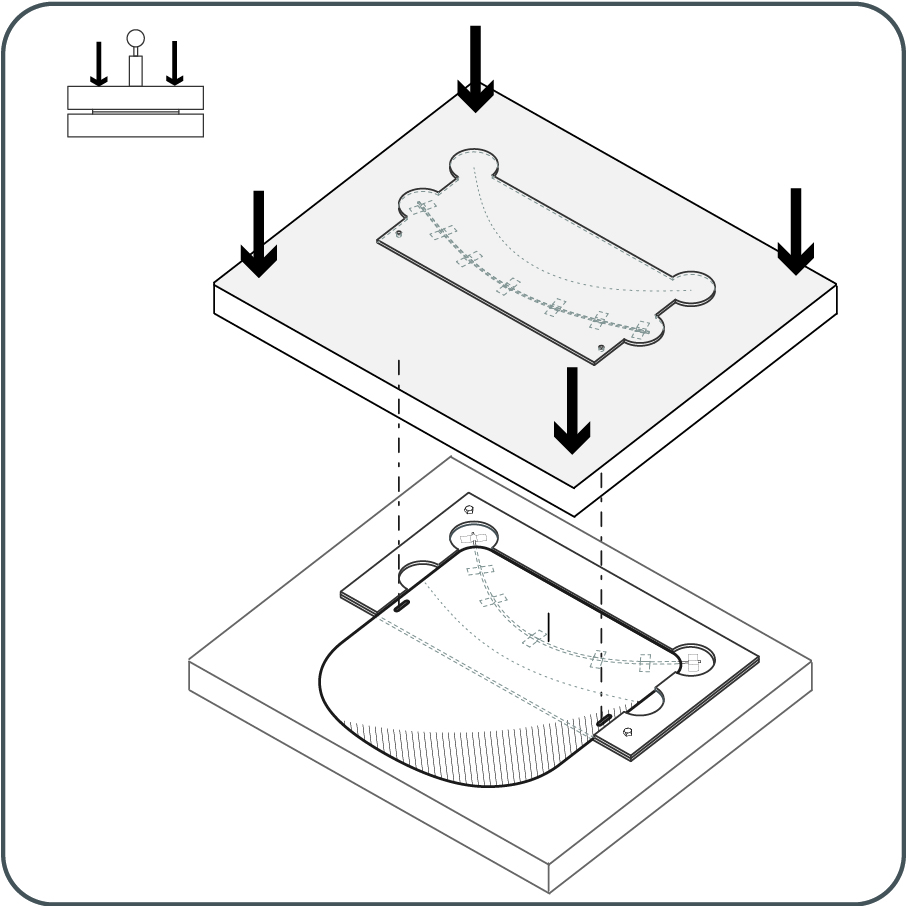
三件式冲压夹具
1

下载适用于您的激光切割机底座的三件式压模夹具的激光切割模板。(切割模板的尺寸显示在文件名中。)根据模板文件对MDF进行激光切割。
2
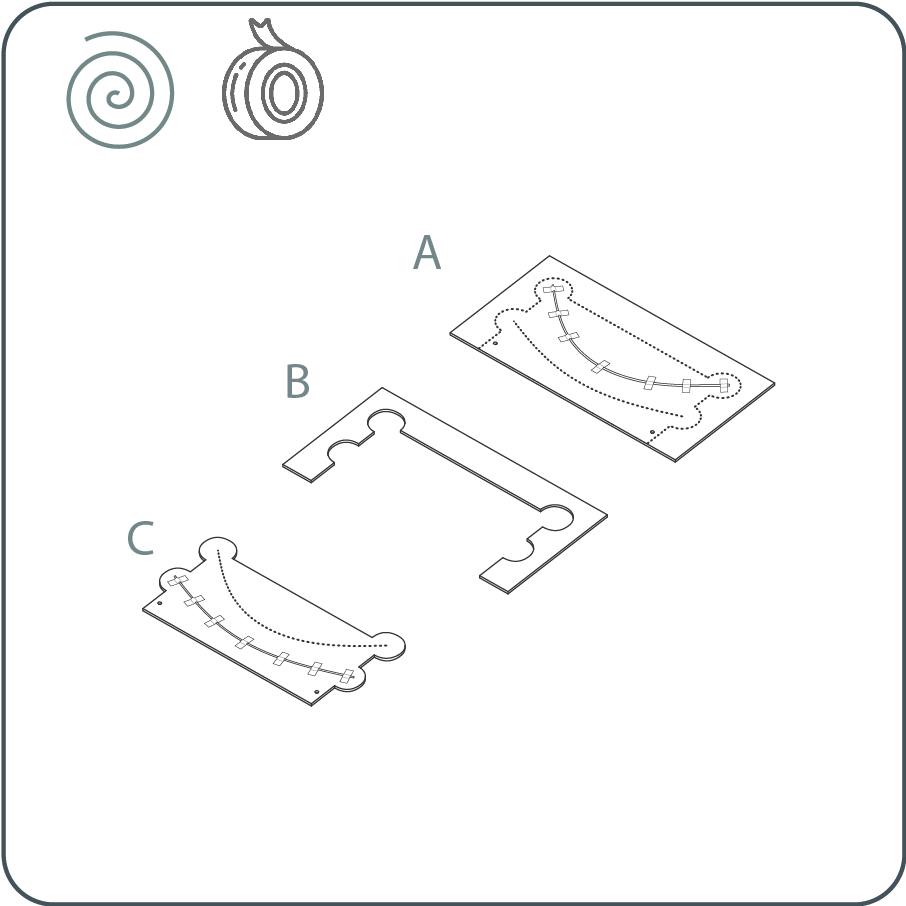
从激光切割机上卸下冲压夹具的3个部分。将钢丝绳切成模板A和C部分中虚线的长度。将金属线用胶带贴压力夹具A和C凹槽中的虚线上,确保不要偏离虚线,也不要超出虚线的两端。
3
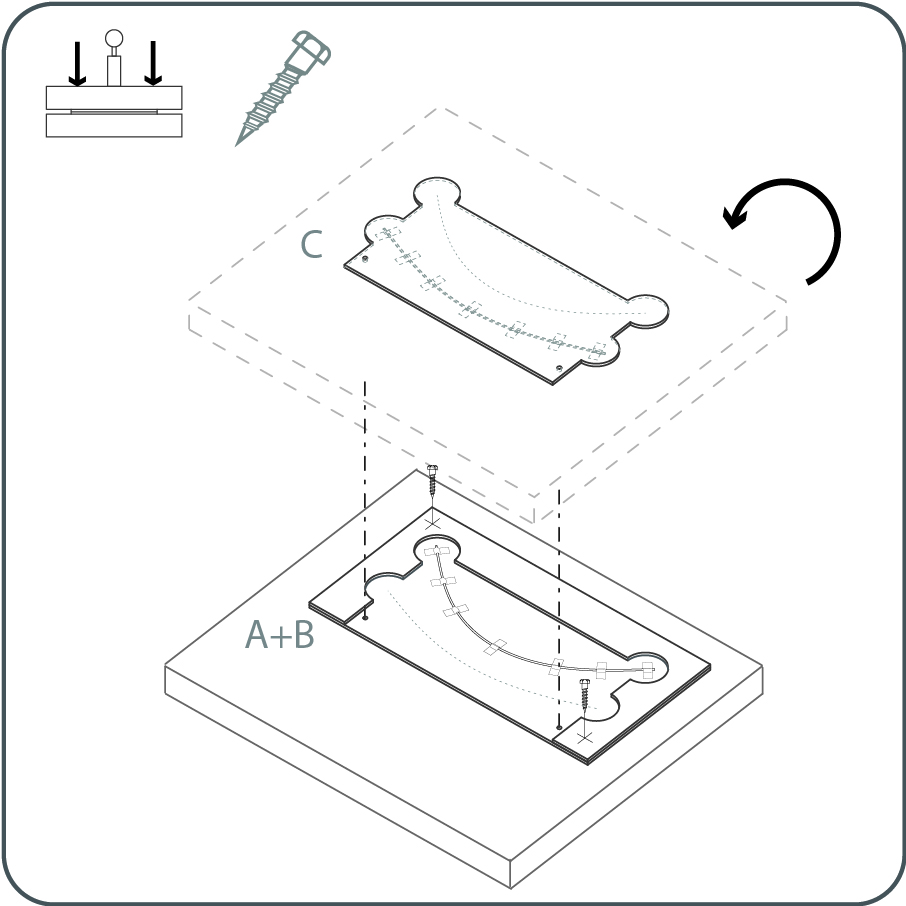
用短木螺钉将B部分装到顶部A上。将组合起来的A和B部分连接到一个基板上,以保证压力均匀分配在夹具表面上。对C部分执行相同的操作。
护罩
1
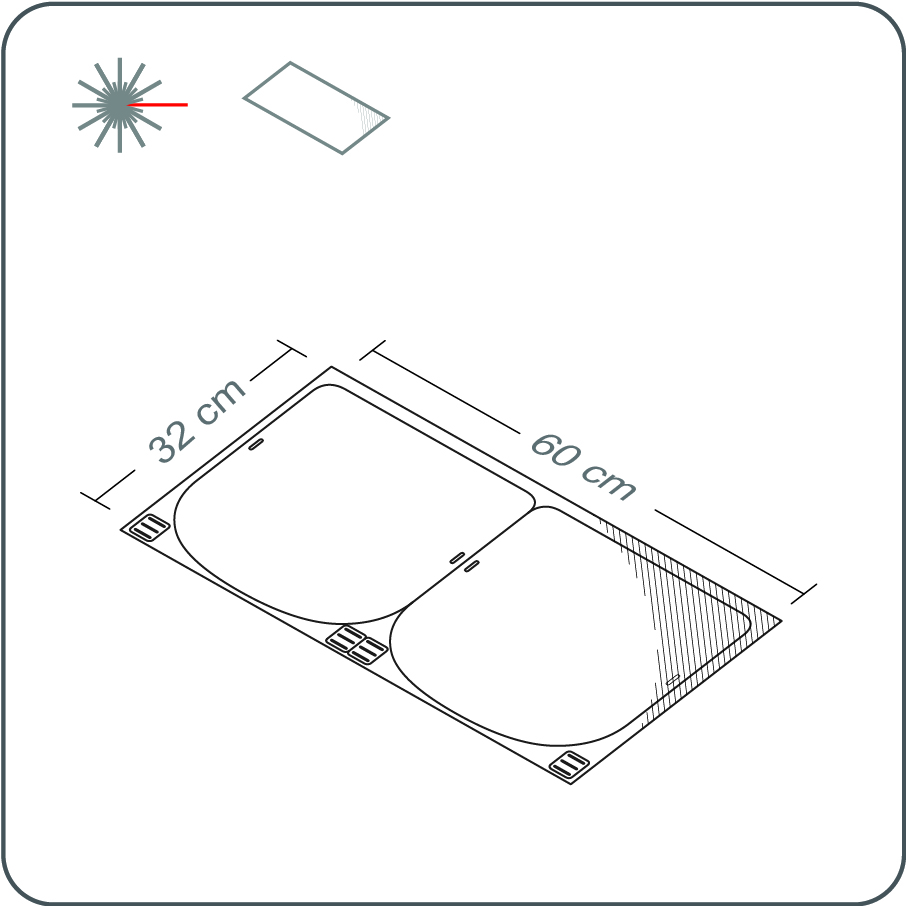
下载适合您激光切割机床身的HappyShield激光切割模板。 (切割模板的尺寸显示在文件名中。)
2
按照模板文件激光切割透明塑片。注意调整激光切割机的功率和速度设定,确保其能够切穿整个塑片材料。
切割后,从激光切割机上卸下得到的防护罩和防滑夹。如果需要,用酒精擦拭护罩和夹子的边缘,或用任何肥皂清洗,以除去塑片上的激光切割残留物。
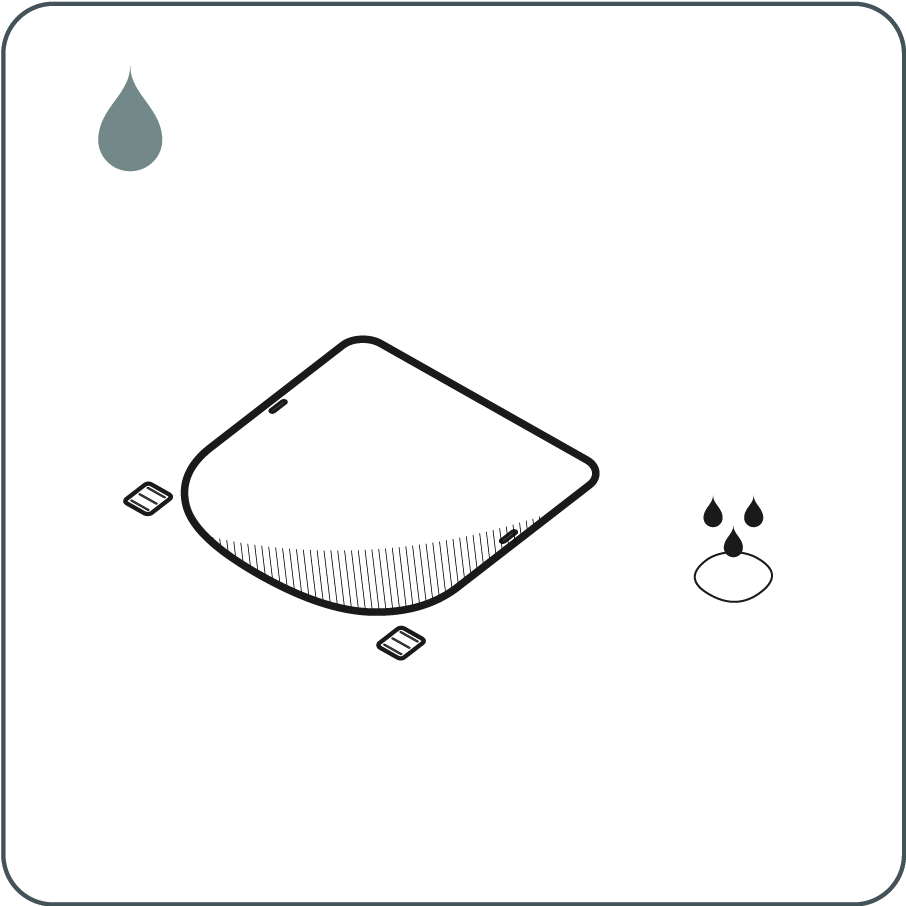
3
将塑片插入三件式冲压夹具中,按压形成弯曲的褶痕。 Insert shield into the 3-part press jig and press to create the curved creases.
4
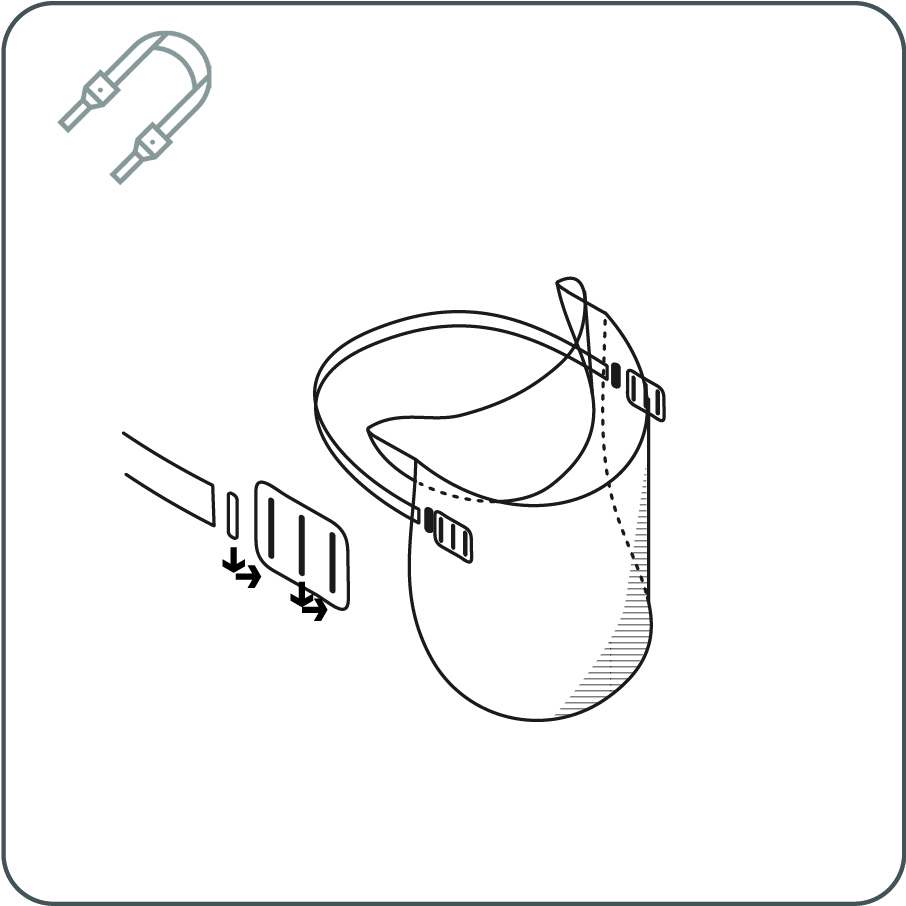
切下400毫米长的松紧带。将穿过两端的摩擦夹。将松紧带两边与两个防滑固定夹连接。
5

将连接好的防滑夹从护罩带孔向前穿出。