 HappyShield
Disclaimer
The University of Cambridge (UC) and the University of Queensland (UQ) make no warranty of any kind, express or implied, about the design, characteristics, durability, proper use or performance of the HappyShield, including but not limited to implied warranties of merchantability and fitness for any particular purpose. The HappyShield is designed to minimise exposure to fluids and sprays, but UC and UQ do not warrant that HappyShield will protect users from COVID-19 infection or any other infectious disease. Nothing in this material constitutes medical advice, and users should seek their own medical advice about whether HappyShield is suitable for the use they intend, and whether they should use it in conjunction with any other medical or other strategies. To the fullest extent allowed by law, UC and UQ exclude all implied warranties, guarantees, terms and conditions. UC and UQ are not liable for any claims, demands, damages or injuries, including but not limited to property damage, bodily injury or illness, death, indirect, special or consequential damages (“the Claims”) arising out of using the HappyShield, and users of HappyShield release UC and UQ and their officers, employees, contractors and agents from all Claims.
Tools
- Laser-cutter
- 10-tonne press
- Pliers capable of cutting 1 mm steel wire rope
- Scissors or razor blade
- Drill or screw-driver
Materials
3-Part Press Jig
- 4 mm MDF
- 1 mm steel wire rope
- 6-20 mm wood screws
- Clear plastic tape
Shield
- 0.5 mm thick Polyethylene terephthalate (PET) or Acetate sheet
- 20 mm wide knit elastic strap (70% polyester 30% rubber)
Instructions
3-Part Press Jig
1

Download the laser-cutting template for the 3-part press jig which fits the bed of your laser-cutting machine. (The dimensions of the cutting templates are given in the filenames.) Laser-cut the MDF using the template file.
2
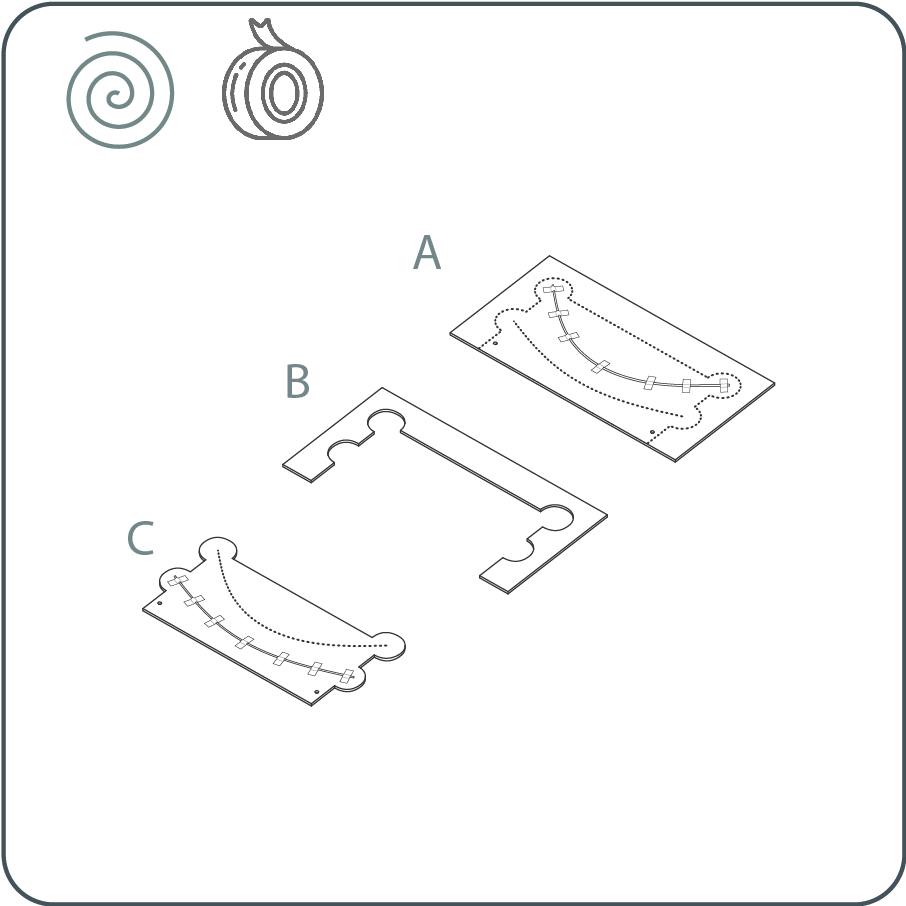
Remove the 3 parts of the press jig from the laser-cutter. Cut the wire rope to the length of the dashed curves in parts A and C of the template. Tape the metal wire onto the dashed curve the groove of the parts A and C of the press jig, being sure not to deviate from the dashed curve, and not to extend beyond the ends of the dashed curve.
3
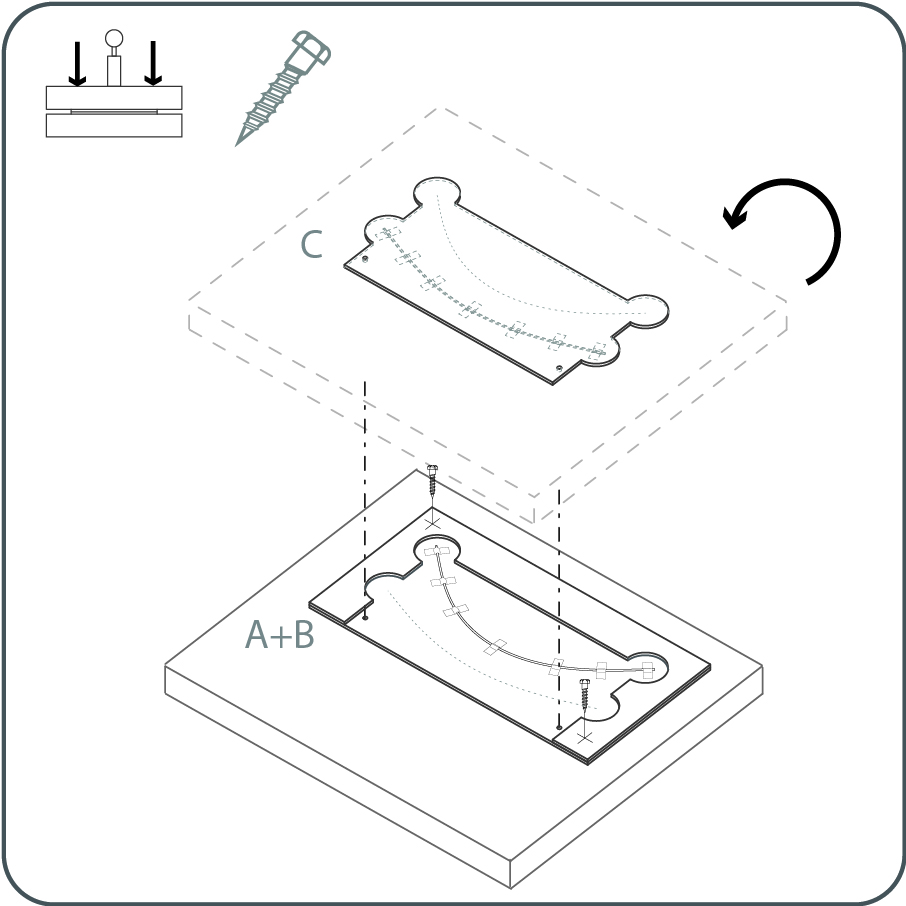
Attach Part B to top A using short wood screws. Attach the combined Part A and B to a block as needed to distribute pressure evenly across the jig surface. Do the same for Part C.
Shield
1
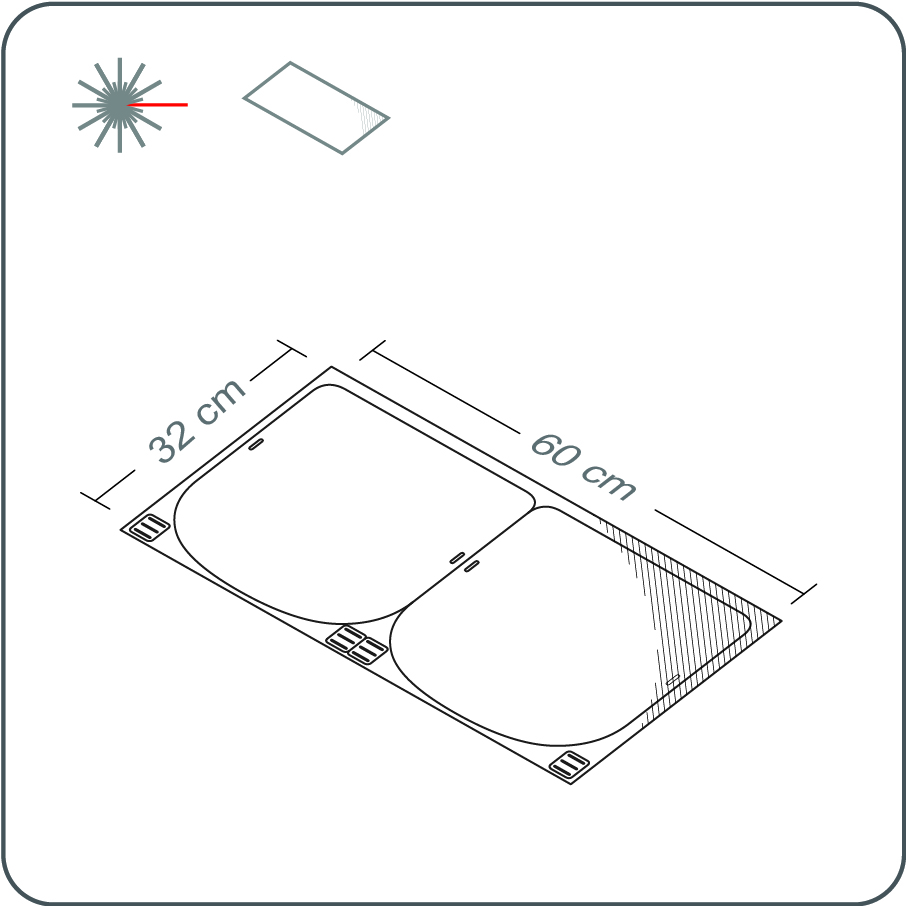
Download the HappyShield laser-cutting template which fits in the bed of your laser-cutting machine. (The dimensions of the cutting templates are given in the filenames.)
2
Laser-cut the clear plastic sheet material using the template file, ensuring that your laser-cutter power and speed settings ensure a cut completely through the depth of the material.
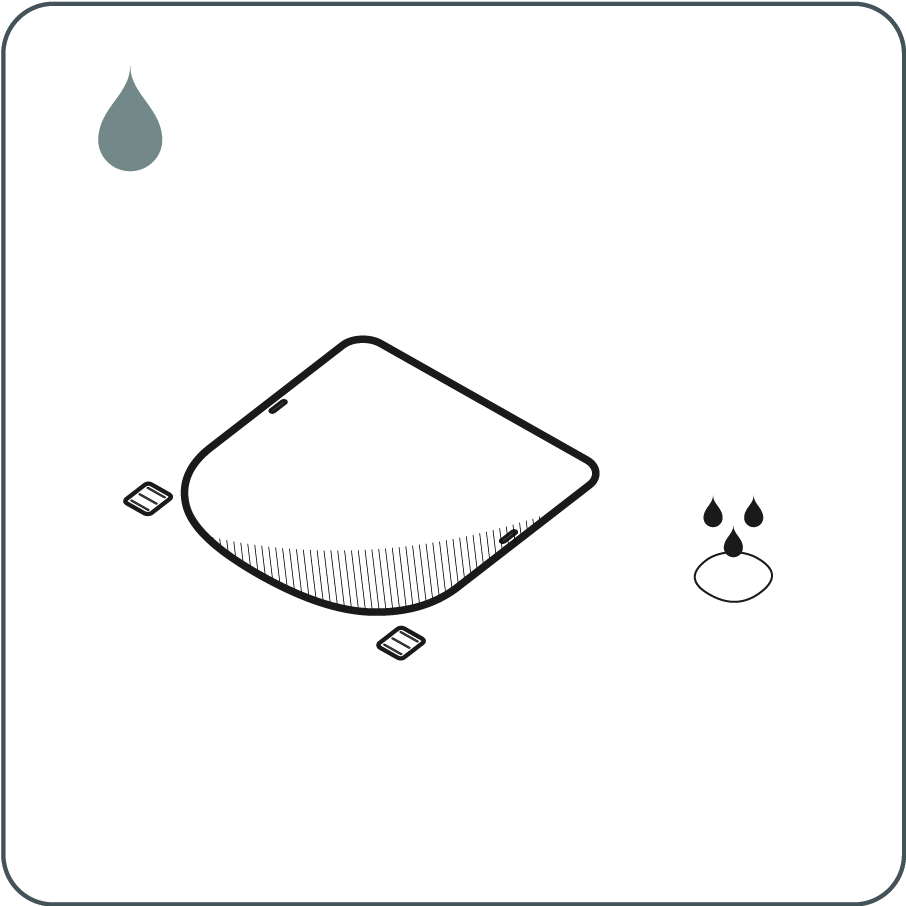
Once cut, remove the resulting shields and friction clips from the laser-cutter bed. If desired, wipe the edges of the shields and clips with alcohol, or wash with any soap to remove any laser-cutting residues from the sheet.
3
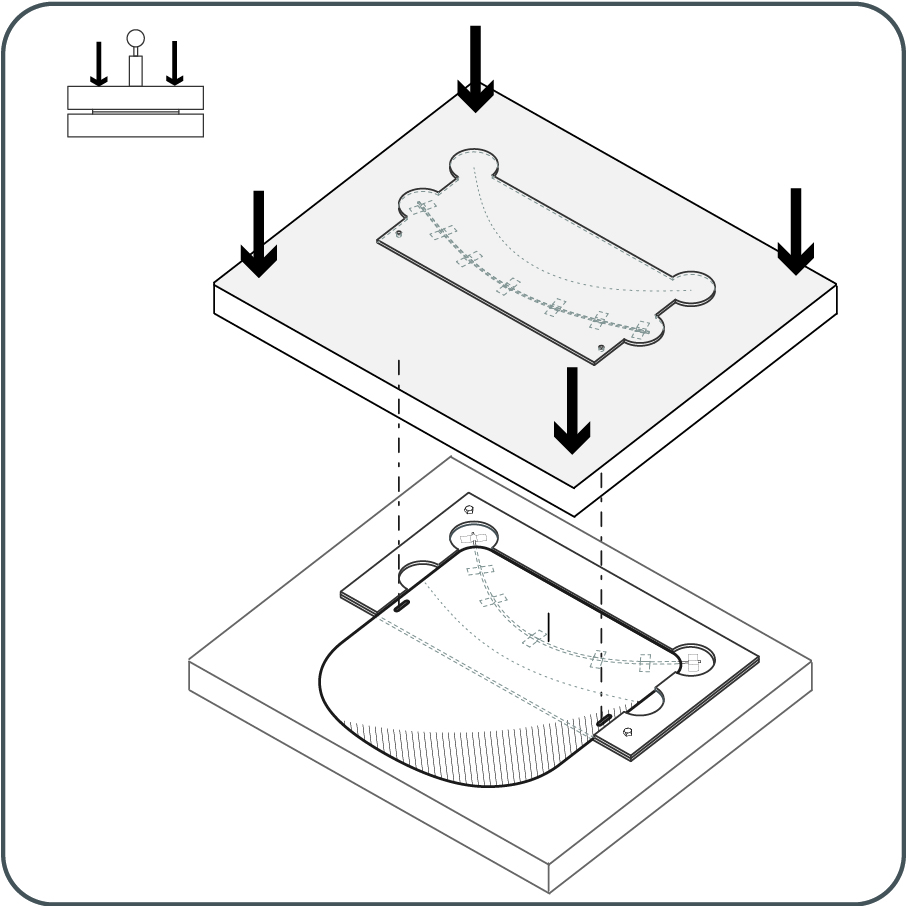
Insert shield into the 3-part press jig and press to create the curved creases.
4
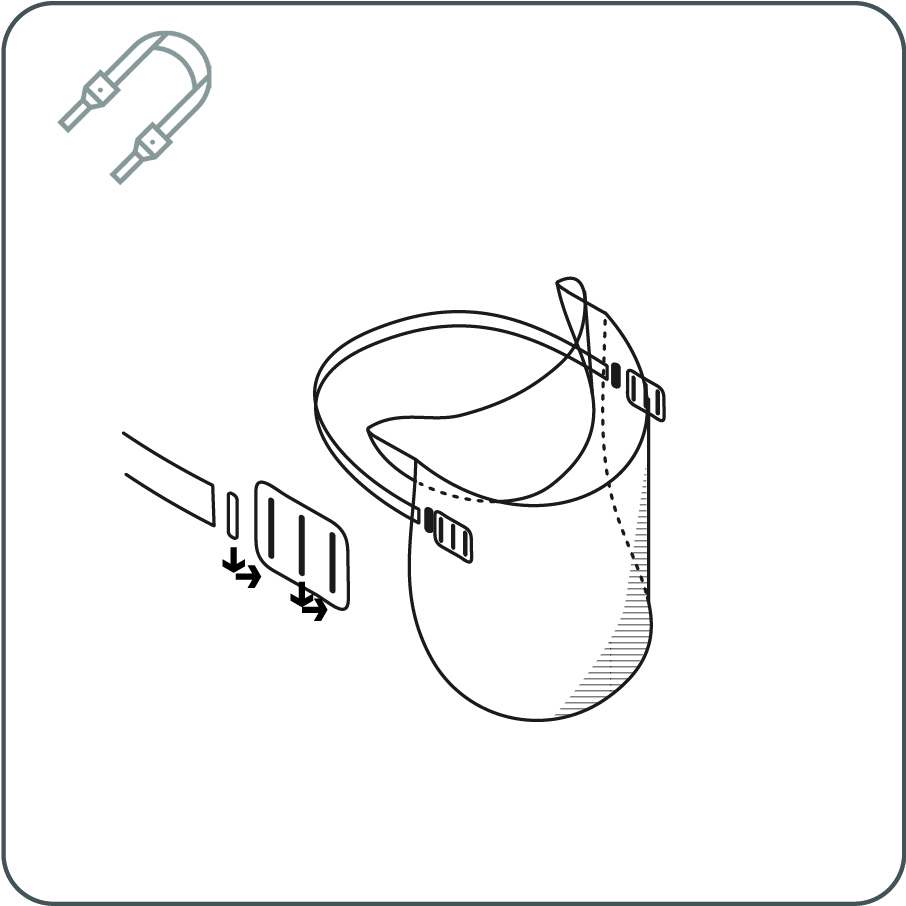
Cut a 400 mm length of elastic strap. Thread the strap through the friction clips on both ends.
5

Pass the threaded friction clips through the holes in the shield from back to front.