 HappyShield
: 10-15′
Disclaimer
The University of Cambridge (UC) and the University of Queensland (UQ) make no warranty of any kind, express or implied, about the design, characteristics, durability, proper use or performance of the HappyShield, including but not limited to implied warranties of merchantability and fitness for any particular purpose. The HappyShield is designed to minimise exposure to fluids and sprays, but UC and UQ do not warrant that HappyShield will protect users from COVID-19 infection or any other infectious disease. Nothing in this material constitutes medical advice, and users should seek their own medical advice about whether HappyShield is suitable for the use they intend, and whether they should use it in conjunction with any other medical or other strategies. To the fullest extent allowed by law, UC and UQ exclude all implied warranties, guarantees, terms and conditions. UC and UQ are not liable for any claims, demands, damages or injuries, including but not limited to property damage, bodily injury or illness, death, indirect, special or consequential damages (“the Claims”) arising out of using the HappyShield, and users of HappyShield release UC and UQ and their officers, employees, contractors and agents from all Claims.
Tools
- Scissors or razor blade
- Ballpoint pen
- Ruler
- Butter Knife
- Printer
Materials
Shield
- 0.5 mm thick Polyethylene terephthalate (PET) or Acetate sheet at least
- 20 mm wide knit elastic strap (70% polyester 30% rubber)
- Tape
Instructions
1

Download your tracing template. A4-sized templates are available for A3-sized shields. Letter-sized templates are available for Tabloid-sized shields. If you do not have access to a printer, you can draw your own template using the dimensions shown on the template.
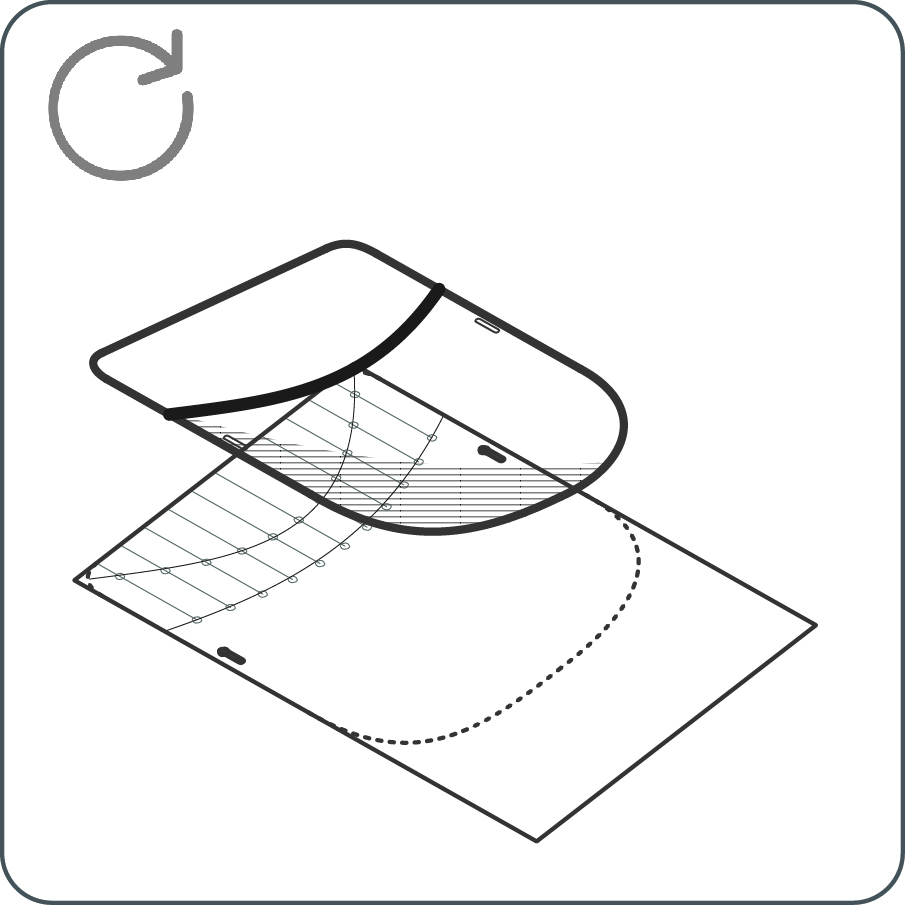
2

Place your transparent sheet on the template. Mark the location of the strap holes with your pen or marker. Don’t worry about the ink, it can be removed with a cloth damped with alcohol.
3
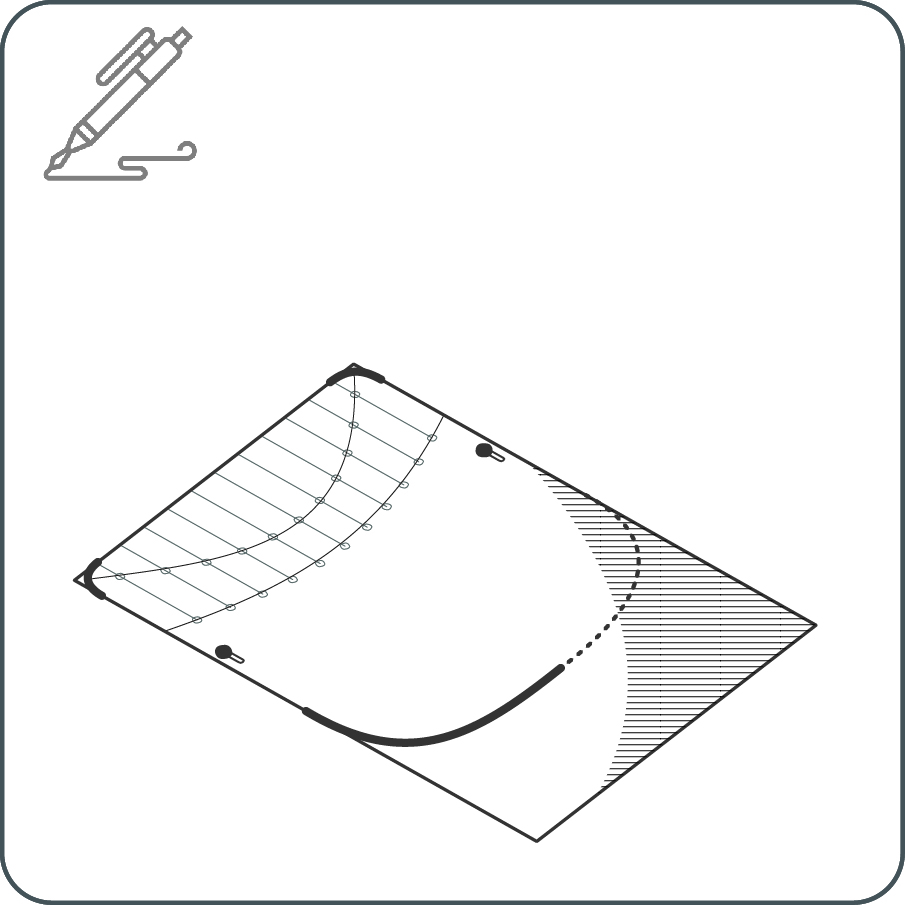
Trace out the boundary of the shield for cutting out.
4
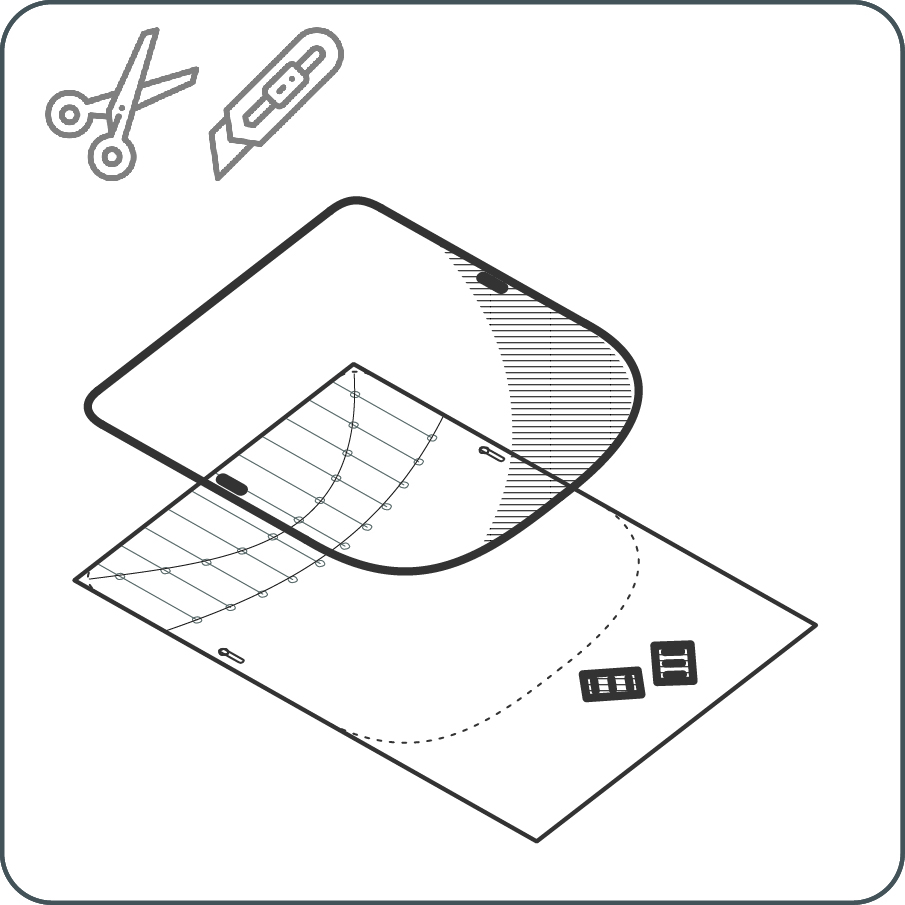
Cut the boundary shape of the shield out using scissors or a razor blade. Cut out the strap holes. You can use a hole-puncher as well to make these holes.
Next, cut out the friction clips using a razor blade.
Now, let’s score a smile on that face!
Creasing Method A
5A
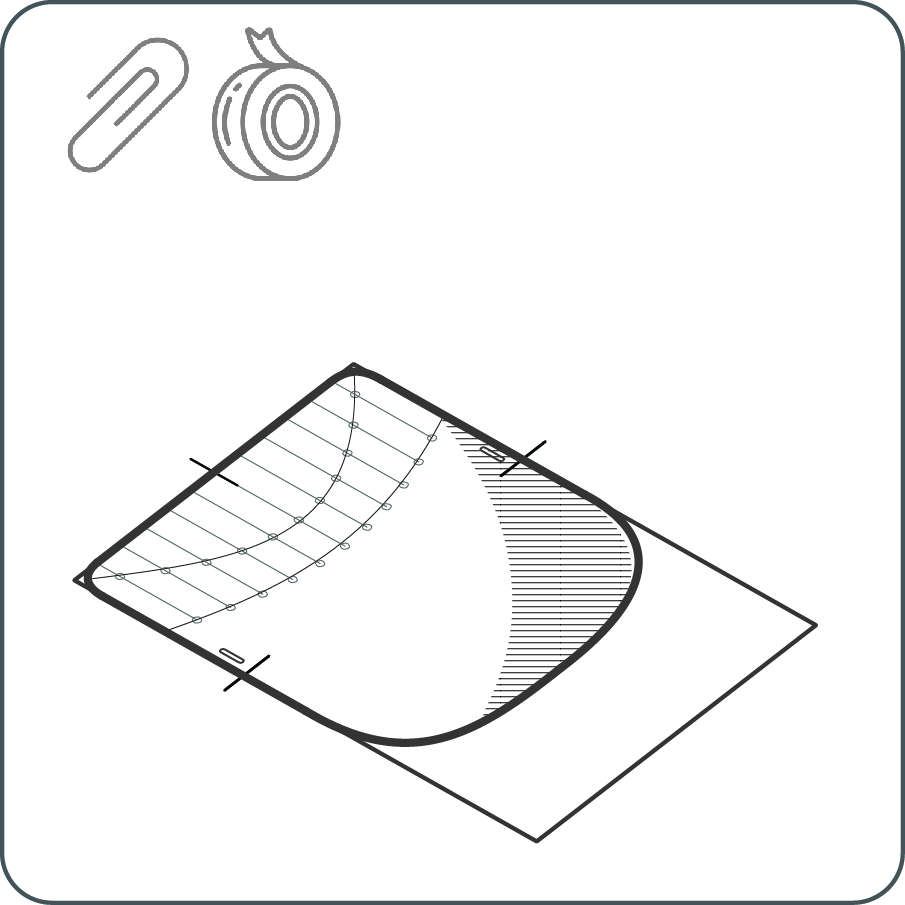
Place your transparent sheet on the template. Fix with clips or tape for precise tracing.
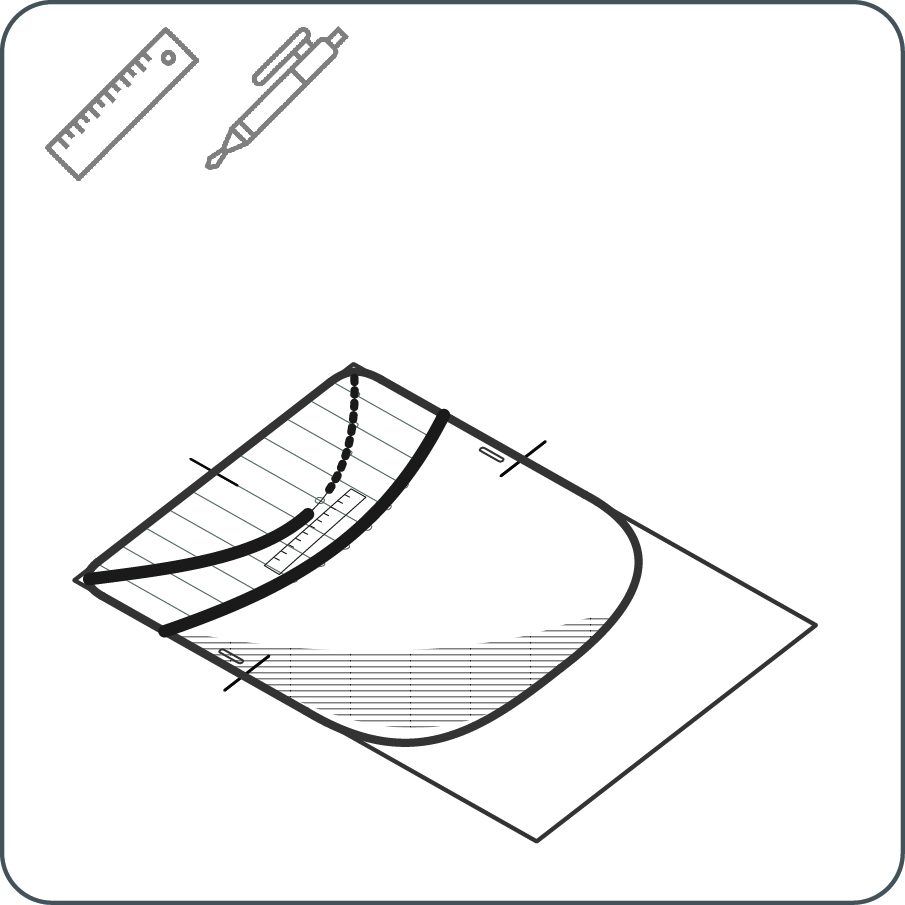
6A
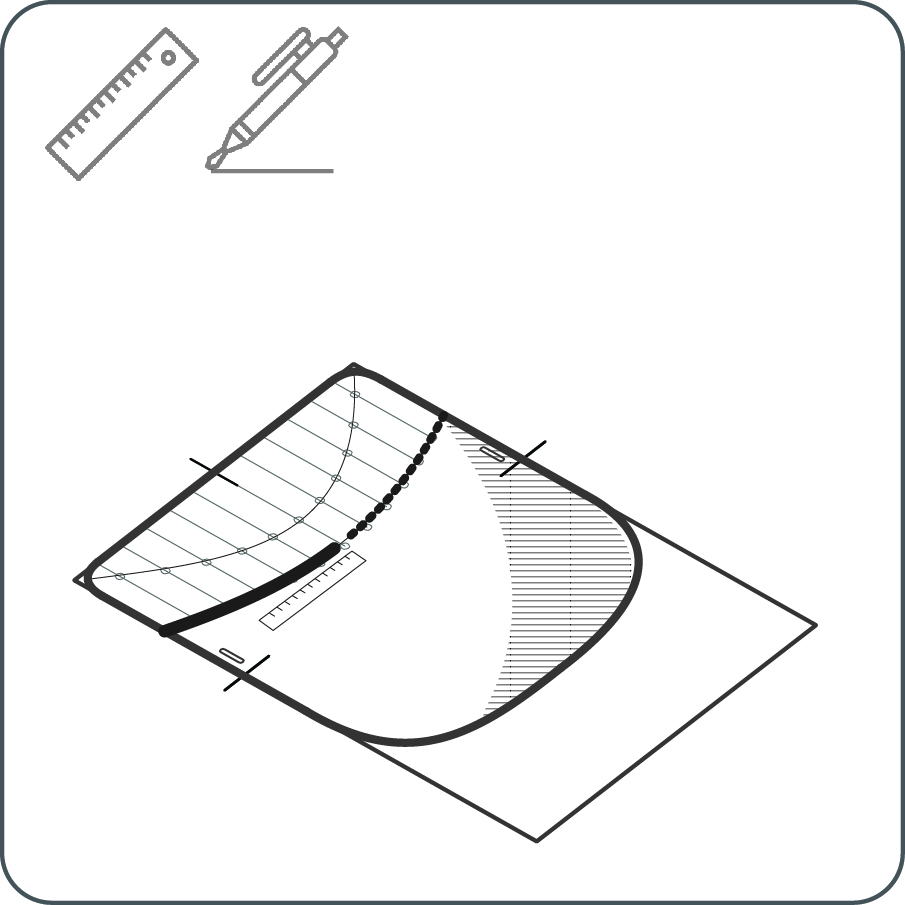
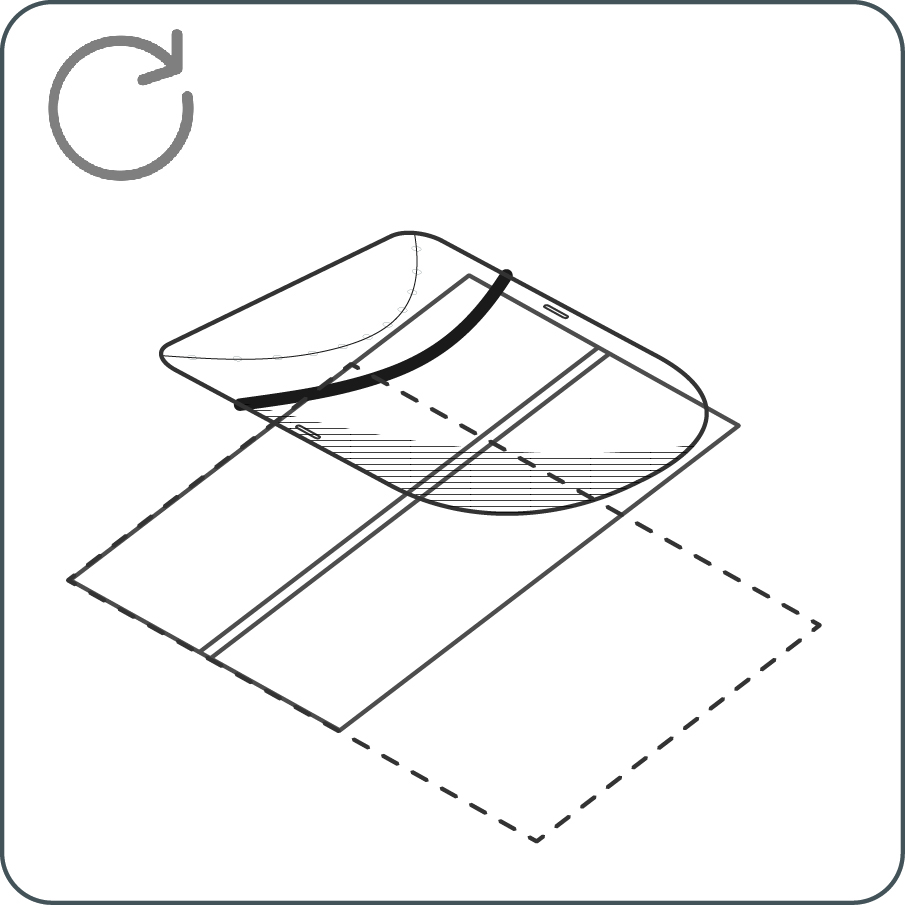
Using a ruler, and applying pressure, trace the straight segments between each consecutive point, using 2-3 strokes as needed until you see a visible indentation in the sheet.
7A
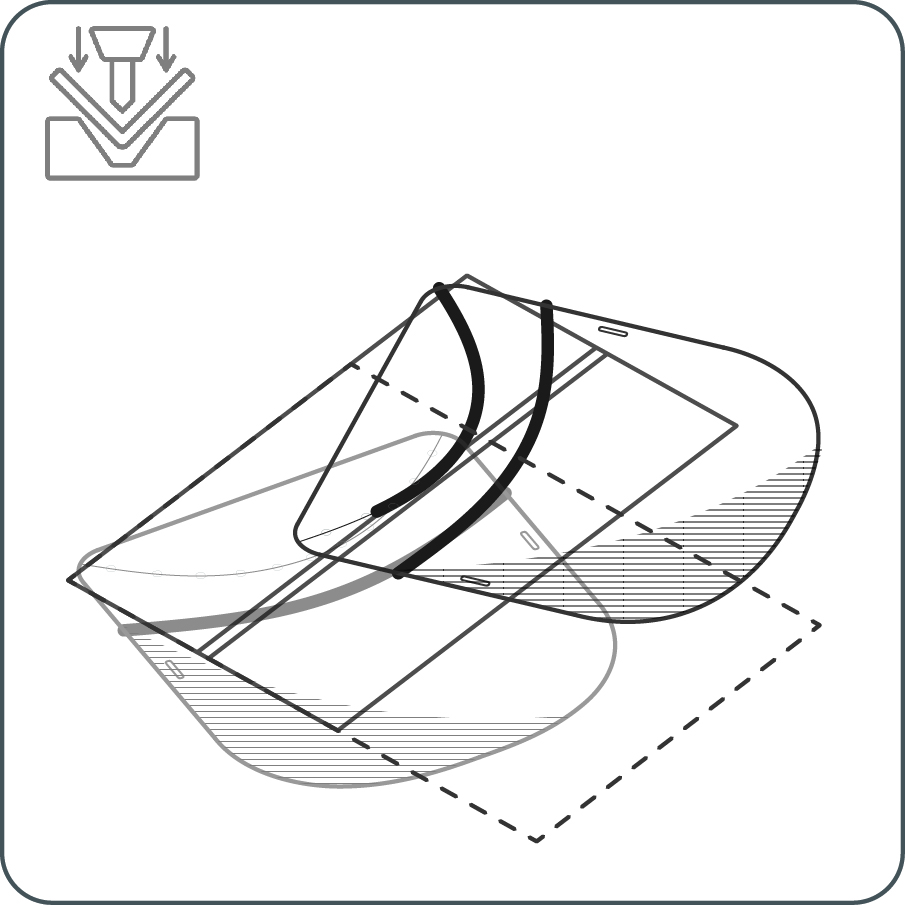
Flip the transparent sheet. Fix the sheet and the template again.
8A
Trace the second curve in the same way as in step 6A.
Creasing Method B
5B
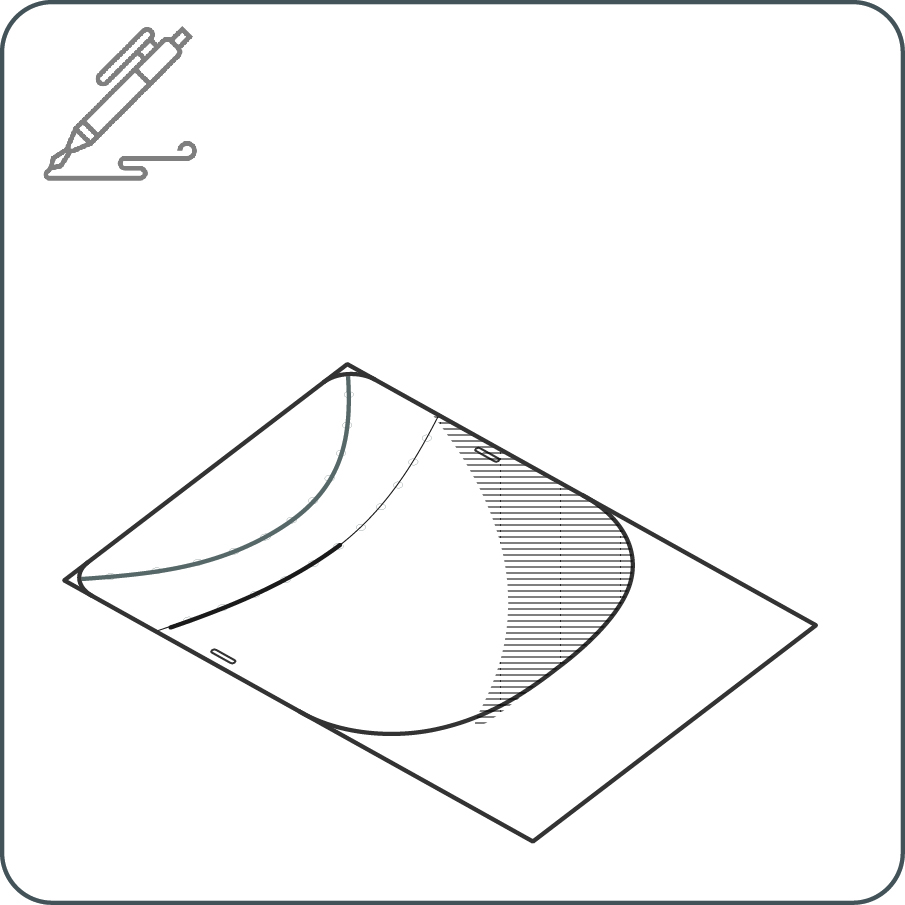
Trace the folding curves with a pen (no additional pressure is required here). If desired, fix the sheet to the template with clips or tape for more precise tracing.
6B
Find a 2-5 mm wide 2-3 mm deep channel at least 5 cm long on an immobile work surface or workpiece. Gaps between floorboards, segments of a dining table or kitchen countertop work well for this. Alternatively, make your own channel in a piece of wood or other material. Next, find a ballpoint pen or any other tool with a relatively dull end (any dull part of a butter knife, spoon, or chopstick can work here as well).
Using one hand to move the sheet as you might a piece of fabric through a sewing machine, use the other hand to repeatedly run the tool over the surface of the material over the channel, following one of the crease curves you have traced.
7B
Flip the shield over.
8B
Repeat step 6B for the other crease curve.
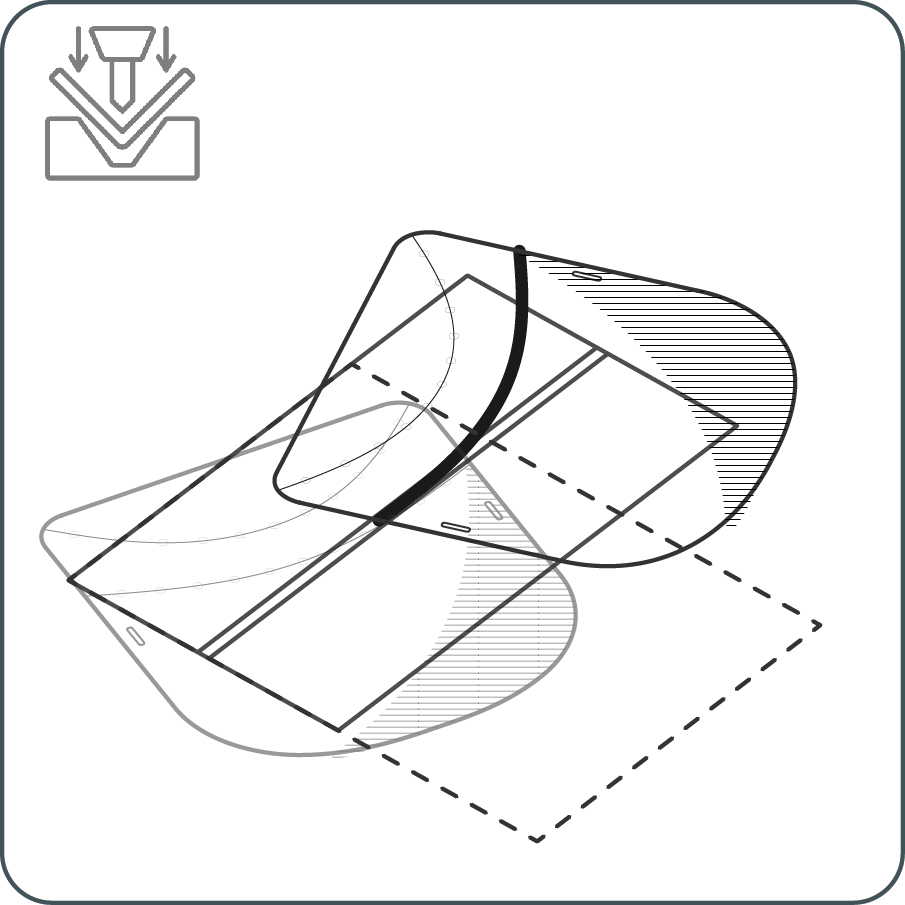
9
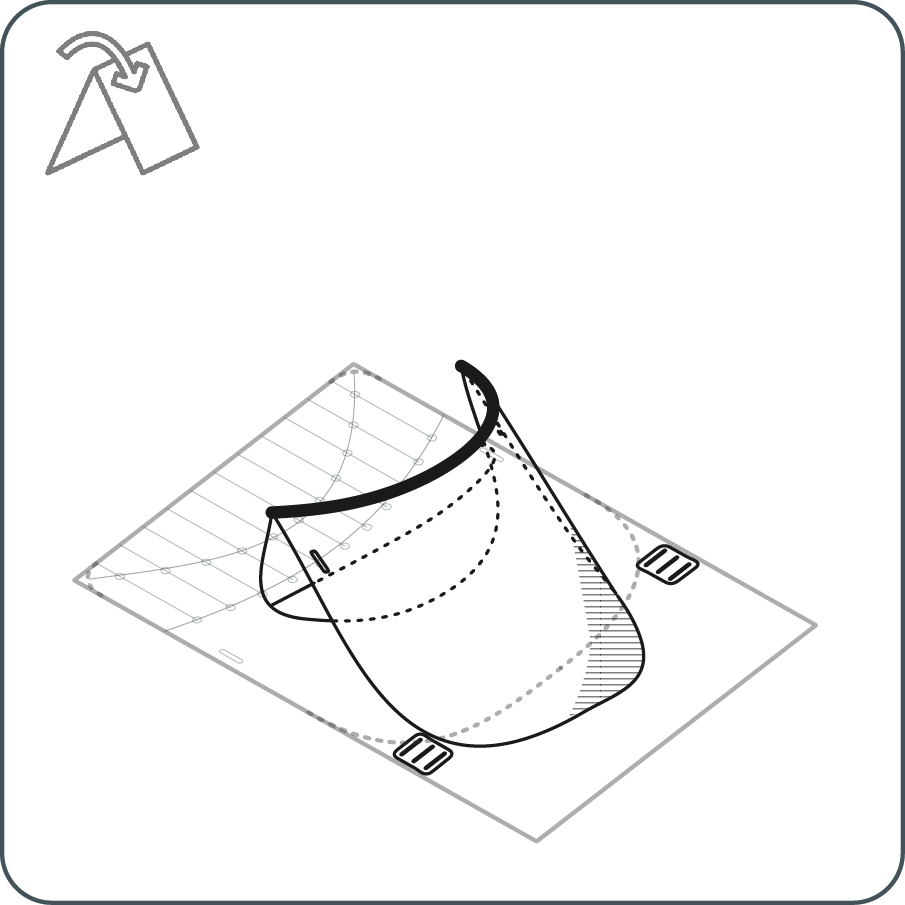
Starting on end of the crease curve, and working your way to the other end of the curve, gently pinch the sheet to fold it along the curve. If some segments do not fold easily, repeat the creasing procedure.
10
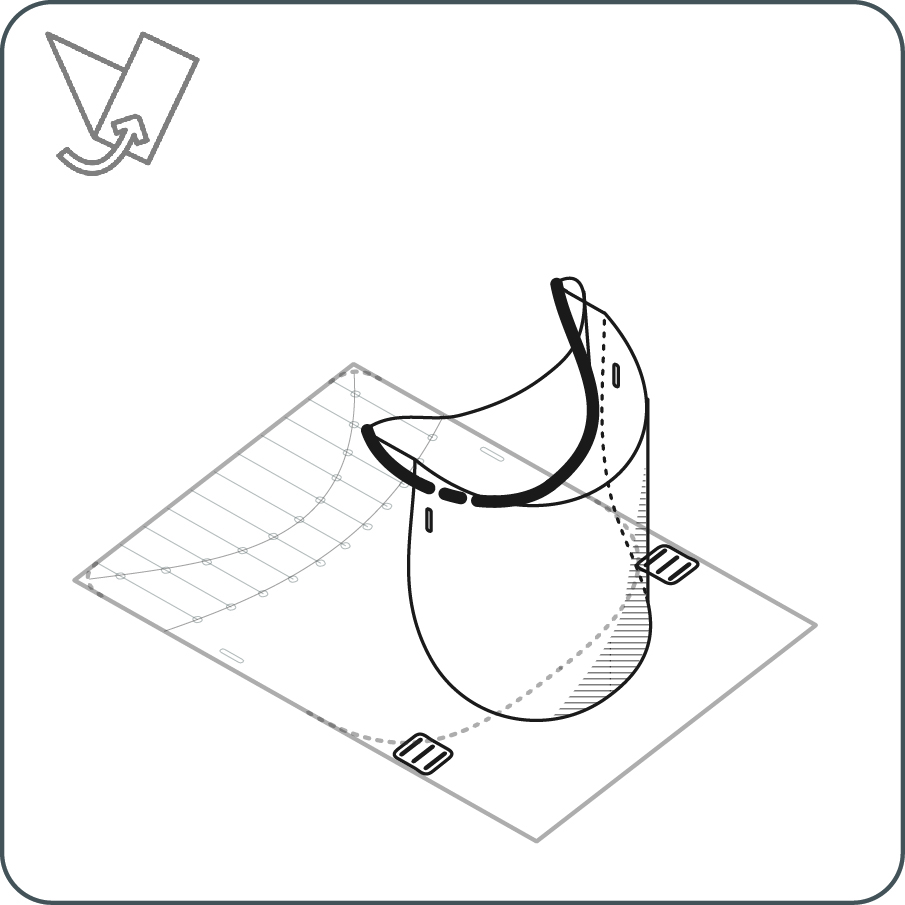
Repeat step 9 for the other curve, but this time, fold the sheet in the other direction.
11
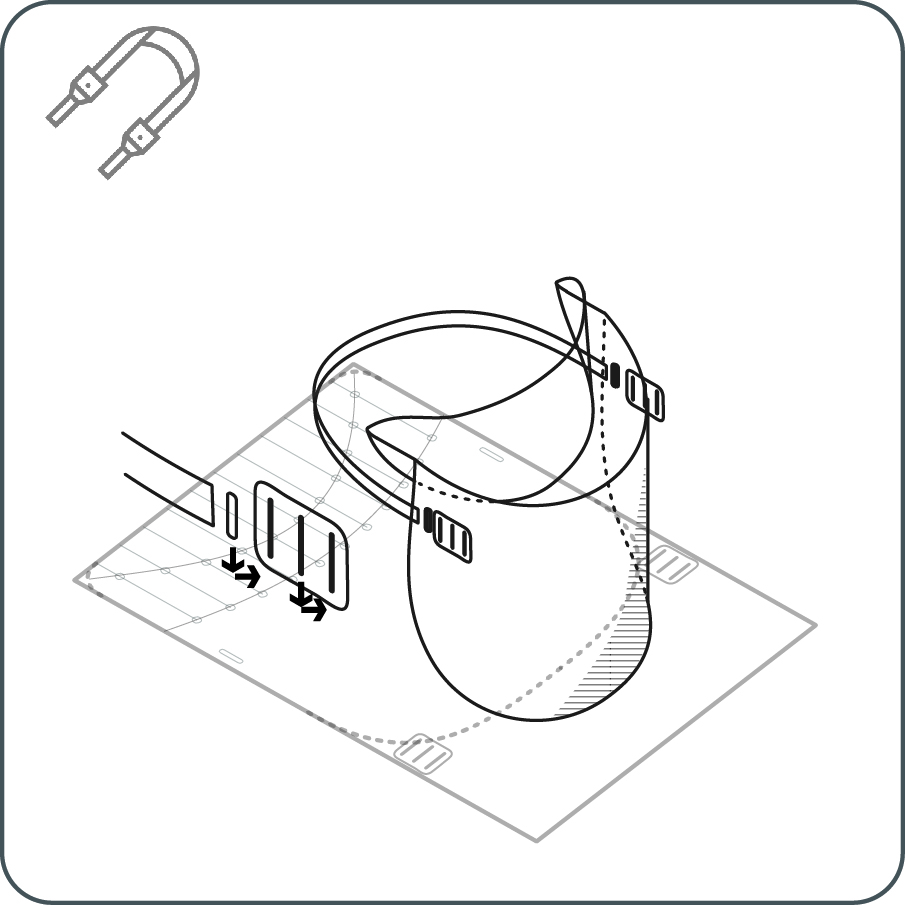
Thread the strap through the friction clips. Pass the friction clips through the holes in the shield from the back side of the shield to the front.